Background

Click any photo in a post to enlarge. To leave a comment, click a post's title or post date.

Sunday, February 21, 2010

Days 60-66

So, if you thought last weeks entry was dry, this one will make you wish you had more interesting friends.  (OK, I'm not into Facebook either - so we all might as well suck it up and admit that living vicariously through others sometimes leaves something to be desired).

This week I accomplished on the car:

Zero, nada, zip, zilch, diddly.

OK, it wasn't that bad, but there isn't much either to talk about or share visually either.  I was about to take my rotors and drums to be resurfaced, but decided at the last minute to clean them first.  I was glad I did, too, because once they were free of rust, one could actually read the engravings indicating the minimum thicknesses! (I bought myself a Clymer manual, but it has as much to say on the subject as the third paragraph of this blog.)  This brought to light something I should have noticed much earlier - which is that one of the rotors is much thinner than the other.  So thin, in fact, that it is already nearly half the minimum thickness.  (Not good!)


The rotor on the left is slightly thicker than the minimum, so I will have it "trued" and replace the one on the right.  Note that whoever surfaced the thin one not only doesn't understand the term "minimum", but took the majority of the thickness off of a single side. . .

The drums are both similar in size and have enough spare to be "trued" as well.

I also spent two days cleaning a half gallon tub of bolts, screws, nuts, washers, clamps and other doohickies.  (I'll spare you the visual).

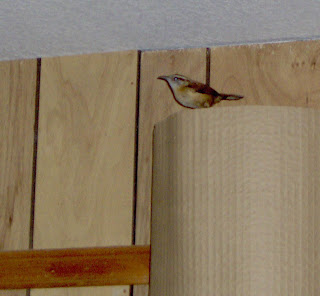
This evening, this little guy took up residence in my shop and wouldn't leave.  As you can see, he moved around the shop quite a bit.  I think he was hunting bugs attracted to the overhead lights.


Sunday, February 14, 2010

Days 53-59

It's been a slow week with little visible progress.  Partially, this is because of the cold weather - it just didn't seem appealing to be in the shop.  Partially it was also the fact that I had a lot of "real life" happenings this week as well.  But mostly, it was due to the type of projects I have been working on.

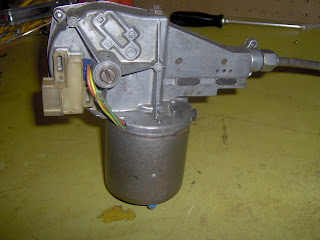
In earlier posts (Day 50) I had begun work on the wiper motor.  Reassembly was challenging, particularly getting the brushes into proper alignment and the motor casing back on.  I wanted to test the assembly, but it has a number of electrical connections and relies on several relays to work.  I attempted to reassemble the wiring harness and jump the assembly to my wife's car.  To do so, I first had to repair the main fuse panel.  There were four contact points that were missing or damaged.  I recreated three of these.  After re-installing the fuse panel I energized the harness and got - nothing.  Tracing the power from the battery outward, it quickly became apparent that the bottom half of the ignition casing is missing, along with it's power connections.


  So, at this point it appears that not only do I have to locate the missing part(s), but the entire current wiring configuration is suspect and will need to be traced circuit by circuit to figure out what was altered and what was not.  So, for now, we will just assume the rebuilt wiper motor works.  If it doesn't, I have two spares that came with the car. . .


I also finally pulled the disks from the front trans-axle assemblies, allowing access to the dust cover and hubs for cleaning.  My screwdriver didn't like removing the screws.


Once off, the dust covers were like no other parts I have cleaned to date.  The brake dust had baked onto the parts in a thick coating.  It took not only a wire brush, but chipping and scraping with a flat screwdriver to get down to bare metal.  Surprisingly, once off and brushed, the dust covers were downright shiny with nearly the original galvanized sheen.  The hub, shaft, and boots, cleaned up nicely as well.


Last Friday I wheeled the chassis outdoors and pressure washed it.  It took a lot of gunk off, but didn't improve the appearance significantly.  This past Friday I did the same with the engine & transmission.  Under the layers of grease were some rusty parts, and some (like the transmission housing) that look pretty good.  The biggest change - there are now identifiable parts in there instead of one gooey blob.


Yesterday we had a workshop with several other cub scout families to work on our derby cars.  Here is my completed car.  I will get photos of the kids cars up once they complete them.


Sunday, February 7, 2010

Day 52

Cleaned up the radiator fill tube / engine compartment brace.


My son and I participate in Cub Scouts.  It is time again for the pine wood derby races.  This year I decided to build a car too.

Hmm, what to build. . .


Just like the real car, it needs a little TLC and paint, but it'll get there.

Day 51

Remember this guy?


This is what it looks like cleaned up. . .


Note that in the before photo, the left boot is scrunched up, and the right one bloated.  That is because someone had pumped the assembly so full of grease that the boots were packed solid and could no longer compress.  Every time you turned the wheel hard it would squeeze out some grease, which explains, in part, why everything inside the front wheel wells were covered with an 1/8" of goo!  Note too, the new tie rod ends - no grease fittings!  Keeping things clean should be a little easier this time round.

I also wire brushed the door hinges, seat rails, and several other parts.

And finally, I got the windshield fluid tank and pump working again.  As expected, the motor was rusted solid.  As also expected, a few whacks with a hammer got things humming again.

Day 50

Began rebuild of the windshield wiper motor.  There was considerable rust inside the magnet/coil housing, and I need to apply rust treatment and paint to the interior of the housing before I can reassemble, so it will be several more days before it is completed.  The switches and circuits all check out though, so it should work once it is back together.  The gears are all in great shape.

Tuesday, February 2, 2010

Day 47

Rebuilt the shift linkage.  There is a particular order all the parts have to go back together, and I got it wrong.  Twice!  I also had to spend quite a while sanding and re-sanding the first linkage section.  It rides in two widely spaced brass sleeves.  Apparently, some time in the past, the linkage was forced, resulting in a slight bow to the linkage shaft.  Combined with years of rust pitting, it was just enough to cause the assembly to stick.  With a little patience, it now moves easily and smoothly again.  In addition to cleaning the larger parts, I also rinsed out, and re-packed the u-joints with grease.


Before


After

Day 46

Rebuilt the clutch master cylinder.  This one was much less complicated than the brake master cylinder.  Still, it took me a good hour to figure out how to disassemble the thing!  As usual, the trick was brute force.  I smacked the housing several times on the counter, and the piston came out far enough to grab and pull out the rest of the way.

The remains of the fluid in the brake master was similar to wax.  The remnants in the clutch master was lumpy like curdled milk.


It would seem engineers in the late 60's - early 70's either didn't yet appreciate, or care about dis-similar metals.  I have been surprised at the number of parts where aluminum and ferrous metals are in contact, and therefore have very advanced corrosion.  The cap to this assembly is a good example.  The body of the cylinder is cast steel, the cap is aluminum, and (had) a steel stiffener plate sandwiched between it and another layer of thin aluminum above.  Luckily, the resulting corrosion worked its way outward rather than inward, so the primary cap is still in decent shape.

I also finally got the pedals off the floor and wire brushed.


I have been scratching my head on this one for some time.  There are four set pins that hold the assembly to the floor, but the pins (due to mushrooming of the heads) can only be driven one way - towards the firewall, which sits only 2" away.  I drove the pin that limits the rotation of the whole assembly in as far as possible, then cut it off flush and drove it through the rest of the way with a punch.   At that point, I was able to rotate the pivot shaft and drive the remaining pins out the way they went in.  

Day 45

No work!  Celebrated end of project at the office!